Friday, February 20, 2009

Rules that always work

I read this from a mail forwarded to me, quite true and funny.

Lorenz's Law of Mechanical Repair:
After your hand become coated with grease, your nose will begin to itch.

Anthony's Law of the Workshop:
Any tool, when dropped, will roll to the least accessible corner.

Kovac's Conundrum:
When you dial a wrong number, you never get an engaged one.

Canon's Karmic Law:
If you use the excuse that you were late for work because you had a flat tire, the next morning you will actually have a flat tire.

O'brien's Variation Law:
If you change queues, the one you have left will start to move faster than the one you are in now.

Bell's Theorem:
As soon as the body is immersed fully in the bathtub, the telephone will ring.

Ruby's Principle of Close Encounter:
The probability of meeting someone you know increases when you are in a situation where you do not want to be seen by anybody.

Willoughby's Law:
When you try to prove to the repairman that a machine doesn't work, it will.

Zadra's Law of Biomechanics:
The severity of the itch is inversely proportional to the reachability of the area.

Breda's Rule:
At any event, the people whose seats are furthest from the aisle arrive last.

Owen's Law:
As soon as you sit down to a cup of hot coffee, your boss will ask you to do something which will last until the coffee is cold.

Wooly's Law:
When you are working late, the boss will never be around. When you are surfing the net, the boss will always drop by.

Wednesday, February 18, 2009

My Favorite Song: Matchbox 20 - How Far We've Come


I'm waking up at the start of the end of the world,
but it's feeling just like every other morning before
Now I wonder what my life is going to mean if it's gone

The cars are moving, like, a half a mile an hour and I
started staring at the passengers who're waving goodbye
Can you tell me what was ever really special about me all this time

(Chorus)
But I believe the world is burning to the ground
Oh well, I guess we're gonna find out
Let's see how far we've come
Well I believe it all is coming to an end
Oh well, I guess we're gonna pretend
Let's see how far we've come

I think it turned ten o' clock, but I don't really know
Then I can't remember caring for an hour or so
Started crying and I couldn't stop myself
I started running, but there's nowhere to run to

I sat down on the street and took a look at myself,
said, "Where you going, man? You know the world is headed for Hell
Say your goodbyes if you've got someone you can say goodbye to"

[Chorus]

It's gone, gone, baby, it's all gone
There is no one on the corner and there's no one at home
It was cool, cool, it was just all cool
Now it's over for me and it's over for you

Well, it's gone, gone, baby, it's all gone
There is no one on the corner and there's no one at home
Well, it was cool, cool, it was just all cool
Now it's over for me and it's over for you

[Chorus]

Let's see how far we've come (Repeat x7)

Code 4 Jay: Sample Table Structure for Shopping Cart Related Tables

After knowing the flow of the shopping cart, you also need to understand the back-end of the module in terms of table design and SQL insertion flow which running in the code. First and foremost, below are the sample table design:

Shopping:
  • shoppingID - Every shopping cart should have an ID so that it is unique to all user.
  • memberID - Acquire from Member table.
  • productID - Acquire from Product table.
  • productType - Product info, you may have something else.
  • productBrand - Product info, you may have something else.
  • productSeries - Product info, you may have something else.
  • productPrice - Product price, is a compulsory information for shopping cart.
  • shoppingQuantity - Purchase quantity.
  • shoppingTotal - Total price. productPrice multiply with shoppingQuantity.
  • shoppingImage - To display the product image, optional.
Sales:
  • salesID - Every sales should have an ID so that it is unique to all other sales.
  • shoppingID - Acquire from Shopping table.
  • memberID - Acquire from Member table.
  • productID - Acquire from Product table.
  • productType - Product info, you may have something else.
  • productBrand - Product info, you may have something else.
  • productSeries - Product info, you may have something else.
  • productPrice - Product price, is a compulsory information for shopping cart.
  • shoppingQuantity - Purchase quantity.
  • shoppingTotal - Total price. productPrice multiply with shoppingQuantity.
  • paymentID - Acquire from Payment table, every successful sales should involved a payment.
  • paymentDate - Acquire from Payment table, which mark the date of payment made.
Payment:
  • paymentID - Use to identify every payment made by the user.
  • memberID - Acquire from Member table.
  • paymentTotal - Payment information, compulsory
  • paymentMode - Payment mode: Credit Card, Direct Bank Debit, Charge Card.
  • paymentSalutation - Payor salutation.
  • paymentFName - Payor first name.
  • paymentLName - Payor last name.
  • paymentAddress - Payor given address.
  • paymentCity - Payor given city in the address.
  • paymentState - Payor given state in the address.
  • paymentCountry - Payor given country in the address.
  • paymentPhoneNo - Payor contact number.
  • paymentEmail - Payor email address.
  • paymentOriginal - Is the address belongs to the payor? Or someone else address?
  • paymentDate - Date the payment is made.
  • paymentBank - Selected bank in Direct Bank Debit payment mode.
  • paymentCardType - Select card type in Credit Card and Charge Card payment mode.
  • paymentCardNumber - Respective card number.
  • paymentCardHolder - Card holder name.
For more SQL flow behind the scene, you can refer to the previous post, I have updated it with additional back-end info.

Tuesday, February 17, 2009

Code 4 Jay: Sample Shopping Cart Flow

As per requested, below is a sample of shopping cart flow which I used before for one of my college projects, the system is never be commercialize so don't panic if you see your brand logo in my system, they are all for academic purpose :)

Alright, let's get going. As a pre-step to launch the shopping cart, you need to pick an item for the inventory. In this case, it will be a mobile phone accessories as shown below. Your inventory page should consists of "Add to Cart" kind of button for the user to load this goods into the cart.


After clicking on the "Add to Cart" hyperlink, it opens up the page below which marked as "Place Order (Step 1 of 5)" which also indicates that there are 5 steps involve in this shopping cart module. The user is required to enter a purchase quantity into the "Order Quantity" textbox and click "Add to Cart" in order to add the item into the cart.


Soon after clicking on the "Add to Cart" button, it will open up your "Cart" and show you what your cart is currently holding. I have done a lot of testing on this hence you can see I have plenty of goods in my cart which really cost me a fortune if this is for real. After the user confirming the goods in the cart and decided to complete the shopping, the user shall click on the "Delivery Information" button to confirm the delivery address.

Behind the Scene: Upon clicking "Add to Cart" button, you should add all information into the Shopping table.


By doing so, it will opens up the 3rd step of the shopping cart which requires the user to provide the delivery address, either own address, or designated recipient's address. Click on the "Payment Information" to proceed to the next step.


This page is pretty long, so I divided them into 3 screenshots. The first part is merely a display of the cart as a final confirmation of purchase.

Behind the Scene: Upon clicking "Payment Information" button, you should keep all the delivery information into Session respectively. All delivery information related Session will then be use in the following page.


This is the following part which I found interesting and added it to enhance my system. It is a loyalty point counting system where user can actually get discount from the accumulated points obtained from previous purchases.


Finally, this part is the payment method. It could be done by credit card, charge card, and direct bank debit. It is quite simple to do simulation on credit card and charge card, and that time I decided to try something different by simulating direct bank debit payment process. The user will then select the respective bank for the payment and "Submit".


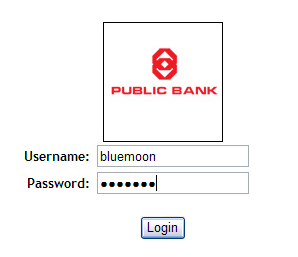
What the user will see is a pop up new window that opens the bank homepage (this is not a real one, the real bank homepage looks much more awesome than this.), which requires user to login for his/her online bank account.

Behind the Scene: Login validation will be done at this level.


While the user is busy logging into the online banking, the original screen has been change to a processing screen as shown below.


After successfully login into the online banking system, the system will display the requested transaction information and user can choose to either proceed or cancel the transaction. Actual online banking steps may be varied. Since this is a demo, we should see happy ending, let's see what happen when the user click "Process Payment"?

Behind the Scene: Upon clicking "Process Payment" button, you should update the bank account balance.


It will then opens up the notification page saying that the transaction has been successfully done via the online banking.


While the other screen will automatically change to the final step of the shopping cart which is displaying the purchase receipt.

Behind the Scene: Before the screen change to the final "Receipt" screen, it actually does few actions where it will insert the information into Payment table first, then update member's point if you have the loyalty point module, follow by inserting records into Sales table and then finally removing the products from the Shopping table since you already purchased them. Take note that 1 single payment can have multiple sales involved and all this sales records will carry the same payment ID.


Since the main focus of this system is not the online banking side, so that part is far more simple and shabby. I will continue on how the back-end works soon, meanwhile there are few tables need to be present in order for the shopping cart to work:
  • Shopping (is the virtual cart that load in the items)
  • Sales (to store every single complete sold product)
  • Payment (each payment can consists of multiple sales)
Of course you also need to have some basic table for the entire module to work, such as:
  • Member (to trace the user who made the transaction)
  • Bank (to simulate direct bank debit module, is optional if your system doesn't support such payment method)
  • Inventory (to display the product which going to be sold)
Guess I had written enough for today, all the best :)

Friday, February 13, 2009

Left 4 Dead

These are some of the cool and funny pictures which I extracted from Facebook Left 4 Dead group. Join the group to view more cool pics :)


Thursday, February 12, 2009

Let's think about it

There's this quote in Matrix said by Agent Smith to Neo, that we really should think about it:

"I'd like to share a revelation that I've had during my time here. It came to me when I tried to classify your species and I realized that you're not actually mammals. Every mammal on this planet instinctively develops a natural equilibrium with the surrounding environment but you humans do not. You move to an area and you multiply and multiply until every natural resource is consumed and the only way you can survive is to spread to another area. There is another organism on this planet that follows the same pattern. Do you know what it is? A virus. Human beings are a disease, a cancer of this planet. You're a plague and we are the cure."

Code 4 Jay: Basic SQL Statements

Since you already have your "conn" as the SQL connection, below are the 4 basic SQL command that frequently use when building up a system:

SELECT Statement
SELECT statement usually used for displaying records from the DB table on the system to the end user. In order to get this works, you need to have a control in the page to display the extracted records. Since this is just a quick guide, a Label marked as "lblDisplay" will be used as the display control in the page. In your code behind, you should have lines below:

Dim comm1 as SqlDataAdapter = New SqlDataAdapter("SELECT columnname FROM tablename WHERE condition", conn)

Dim ds1 as New DataSet()

comm1.Fill(ds1, "tablename")

lblDisplay.Text = ds1.Tables("tablename").Rows(0).Item("columnname")

By doing so, you should be able to display the FIRST record that you selected from the SQL SELECT statement onto the Label. If you would like to display all of the selected records, you will need to loop through all the "Rows" and it will be better to have a DataGrid as display control instead of a Label, since multiple records may be extracted out.

INSERT Statement
As the name implies, INSERT statement is used to insert new records into a DB table, which usually used in member registration, add new product, and etc. Below are the lines that used for record inserting:

Dim comm2 as SqlCommand = New SqlCommand("INSERT INTO tablename (column1, column2, column3) VALUES ('" & value1 & "', '" & value2 & "', '" & value3 & "')", conn)

conn.Open()
comm2.ExecuteNonQuery()
conn.Close()

Above 4 lines enables you to add new records into the respective table. Do take note that when putting in the values in the statement, you must tag your value with '" & values & "' (single quote follow by double quote, then ampersand. Reverse the sequence while closing the tag), else it will not work :)

DELETE Statement
DELETE statement allows you to remove unwanted records in the DB table permanently:

Dim comm3 as SqlCommand = New SqlCommand("DELETE FROM tablename WHERE condition", conn)

conn.Open()
comm3.ExecuteNonQuery()
conn.Close()

You should always have a condition to define what kind of record to be deleted, else a DELETE statement without condition will remove ALL records in the respective table.

UPDATE Statement
UPDATE statement likely use in modules like edit profile, change password, and etc where it update the column value with the designated new value:

Dim comm4 as SqlCommand = New SqlCommand("UPDATE tablename SET column1 = '" & value1 & "', column2 = '" & value2 & "', column3 = '" & value3 & "' WHERE condition)", conn)

conn.Open()
comm4.ExecuteNonQuery()
conn.Close()

Similarly, UPDATE statement should come with a condition to prevent it updating ALL records in the respective table on the selected columns with the given values.

Wednesday, February 11, 2009

Code 4 Jay: How to set MS SQL connection in Web.config?

In order to get this done, of course you need to have your DBMS and IDE ready, in this case will be MS SQL 2005 and VS 2005 respectively.

First of all, launch your VS 2005 and create a website if you didn't do so earlier. You shall see a file called Web.config created along with your website. Open the file and scroll it downwards the end where you see the line . Right before this line, add in the code below:

<appsettings>
<add key="ConnectionString" value="server = COMPUTER_NAME\SERVER_INSTANCE_NAME;database=DATABASE_NAME;uid=USER_ID;password=PASSWORD">
</add>
</appsettings>

Kindly note that you should have your own value of COMPUTER_NAME\SERVER_INSTANCE_NAME, if you are not sure you can obtain such information from the MS SQL. DATABASE_NAME will be the DB that you are trying to connect, USER_ID and PASSWORD will be the user ID and password that you use to connect MS SQL.

By doing so, you should now have a key called "ConnectionString" which you can use in the project as server connection reference. Next go to your code behind (aspx.vb) by clicking the "+" sign at your aspx file. In code behind you shall see lines like:

Partial Class demo
Inherits System.Web.UI.Page
End Class

Right before the "Partial Class demo", add lines below so that you can utilize all SQL related codes:

Imports System.Data.SqlClient
Imports System.Data

After that, add lines below after "Inherits System.Web.UI.Page":

Dim strConn As String = System.Configuration.ConfigurationSettings.AppSettings("ConnectionString")
Dim conn As SqlConnection = New SqlConnection(strConn)

By doing so, you can now use "conn" as your SQL connection whenever you try to query the DB. As a recap, your final outline of the codes should look something like this:

Imports System.Data.SqlClient
Imports System.Data

Partial Class demo
Inherits System.Web.UI.Page

Dim strConn As String = System.Configuration.ConfigurationSettings.AppSettings("ConnectionString")
Dim conn As SqlConnection = New SqlConnection(strConn)

End Class

Enjoy the fun!