Alright, let's get going. As a pre-step to launch the shopping cart, you need to pick an item for the inventory. In this case, it will be a mobile phone accessories as shown below. Your inventory page should consists of "Add to Cart" kind of button for the user to load this goods into the cart.


After clicking on the "Add to Cart" hyperlink, it opens up the page below which marked as "Place Order (Step 1 of 5)" which also indicates that there are 5 steps involve in this shopping cart module. The user is required to enter a purchase quantity into the "Order Quantity" textbox and click "Add to Cart" in order to add the item into the cart.

Soon after clicking on the "Add to Cart" button, it will open up your "Cart" and show you what your cart is currently holding. I have done a lot of testing on this hence you can see I have plenty of goods in my cart which really cost me a fortune if this is for real. After the user confirming the goods in the cart and decided to complete the shopping, the user shall click on the "Delivery Information" button to confirm the delivery address.
Behind the Scene: Upon clicking "Add to Cart" button, you should add all information into the Shopping table.

By doing so, it will opens up the 3rd step of the shopping cart which requires the user to provide the delivery address, either own address, or designated recipient's address. Click on the "Payment Information" to proceed to the next step.

This page is pretty long, so I divided them into 3 screenshots. The first part is merely a display of the cart as a final confirmation of purchase.
Behind the Scene: Upon clicking "Payment Information" button, you should keep all the delivery information into Session respectively. All delivery information related Session will then be use in the following page.

This is the following part which I found interesting and added it to enhance my system. It is a loyalty point counting system where user can actually get discount from the accumulated points obtained from previous purchases.

Finally, this part is the payment method. It could be done by credit card, charge card, and direct bank debit. It is quite simple to do simulation on credit card and charge card, and that time I decided to try something different by simulating direct bank debit payment process. The user will then select the respective bank for the payment and "Submit".

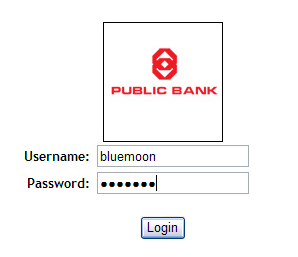
What the user will see is a pop up new window that opens the bank homepage (this is not a real one, the real bank homepage looks much more awesome than this.), which requires user to login for his/her online bank account.
Behind the Scene: Login validation will be done at this level.

While the user is busy logging into the online banking, the original screen has been change to a processing screen as shown below.

After successfully login into the online banking system, the system will display the requested transaction information and user can choose to either proceed or cancel the transaction. Actual online banking steps may be varied. Since this is a demo, we should see happy ending, let's see what happen when the user click "Process Payment"?
Behind the Scene: Upon clicking "Process Payment" button, you should update the bank account balance.

It will then opens up the notification page saying that the transaction has been successfully done via the online banking.

While the other screen will automatically change to the final step of the shopping cart which is displaying the purchase receipt.
Behind the Scene: Before the screen change to the final "Receipt" screen, it actually does few actions where it will insert the information into Payment table first, then update member's point if you have the loyalty point module, follow by inserting records into Sales table and then finally removing the products from the Shopping table since you already purchased them. Take note that 1 single payment can have multiple sales involved and all this sales records will carry the same payment ID.

Since the main focus of this system is not the online banking side, so that part is far more simple and shabby. I will continue on how the back-end works soon, meanwhile there are few tables need to be present in order for the shopping cart to work:
- Shopping (is the virtual cart that load in the items)
- Sales (to store every single complete sold product)
- Payment (each payment can consists of multiple sales)
- Member (to trace the user who made the transaction)
- Bank (to simulate direct bank debit module, is optional if your system doesn't support such payment method)
- Inventory (to display the product which going to be sold)
No comments:
Post a Comment